Philips Sonicare Advance or Essence Model Toothbrush Battery Repair and Replacement Instruction
Tips & Warnings
We are not responsible for any damage or injuries you may incur in the process.
The process described is not recommended by the manufacturer, but can be done. It takes some practice, so be careful in attempting it.
Replacement batteries are provided in our Battery Store. The exact battery configuration and/or service offerings are described as clearly as possible in each listing. These instructions and battery recommendations are for your reference only and are NOT part of sales.
Tried and True Instructions
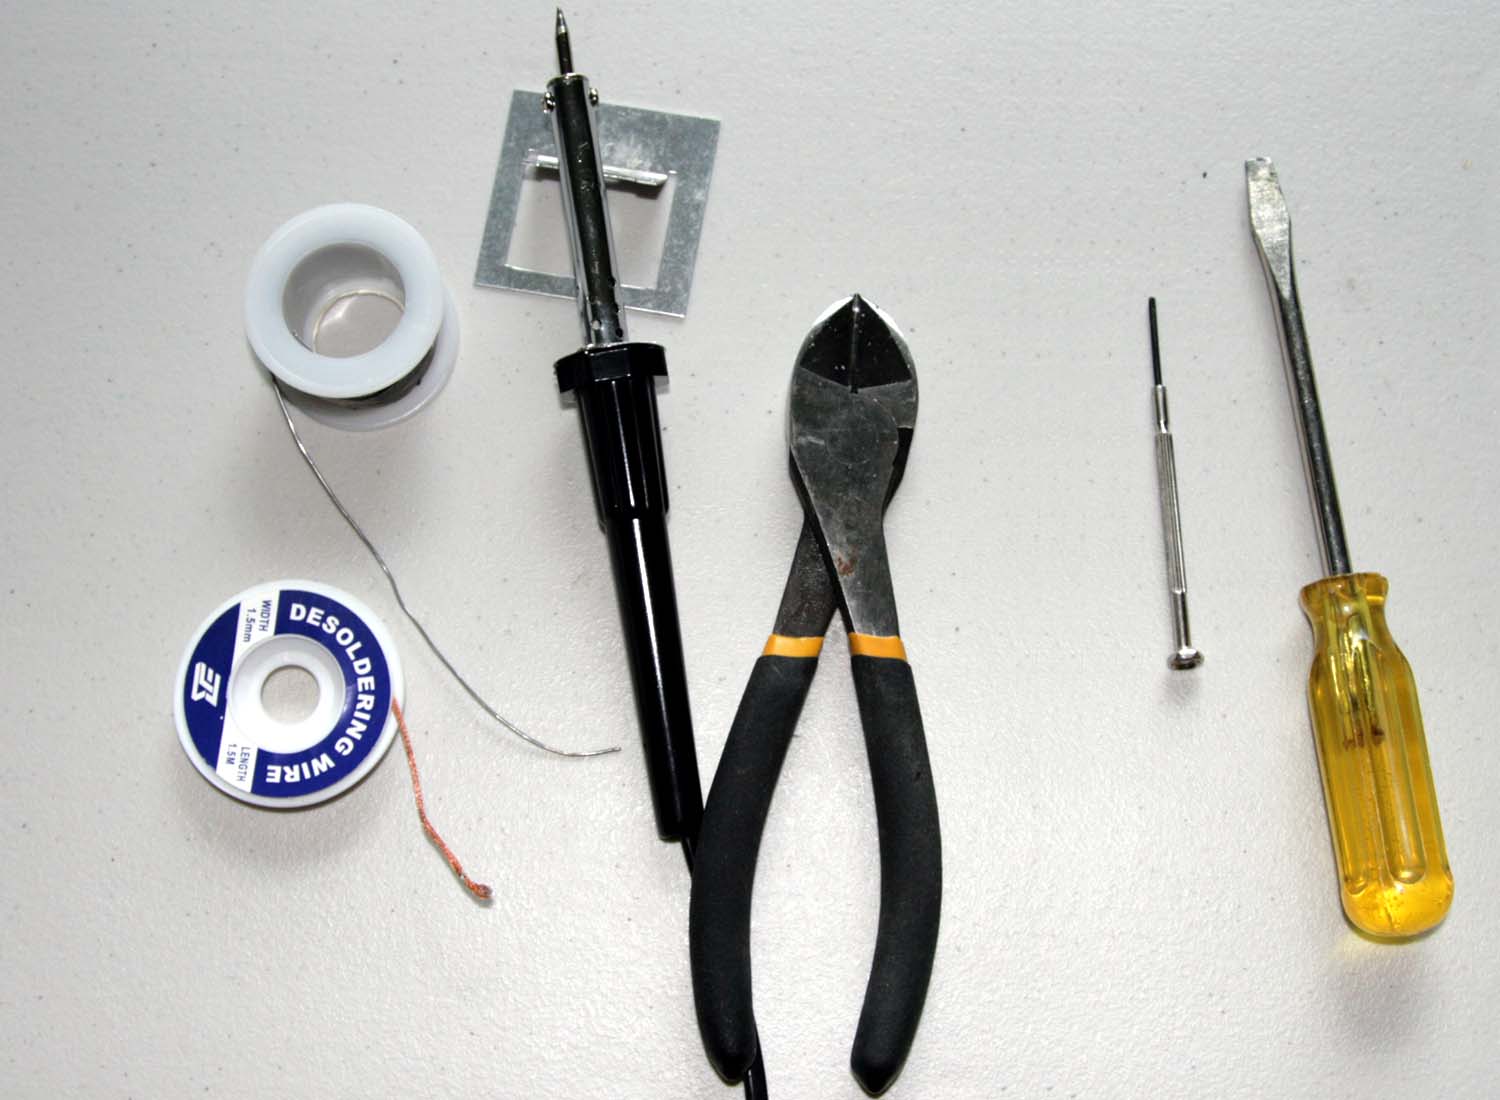
TOOLS: Solder; De-soldering braid; Soldering iron; Cutting pliers; Medium-size flat-head screwdrivers; Super glue.
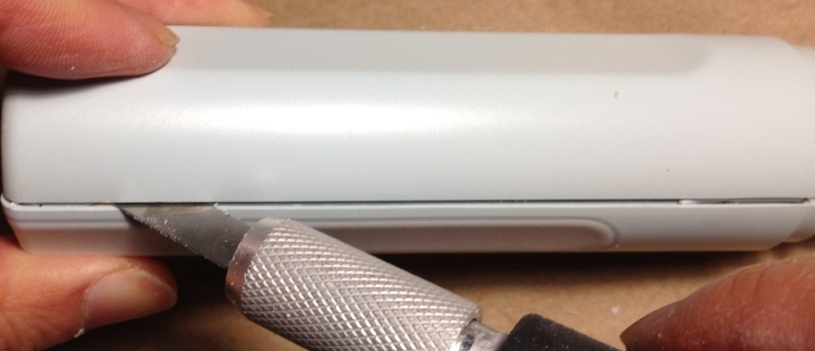
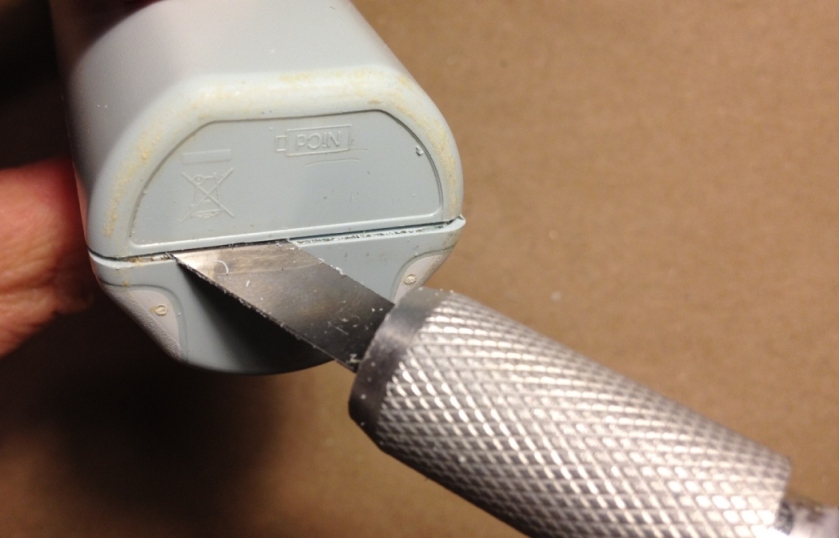
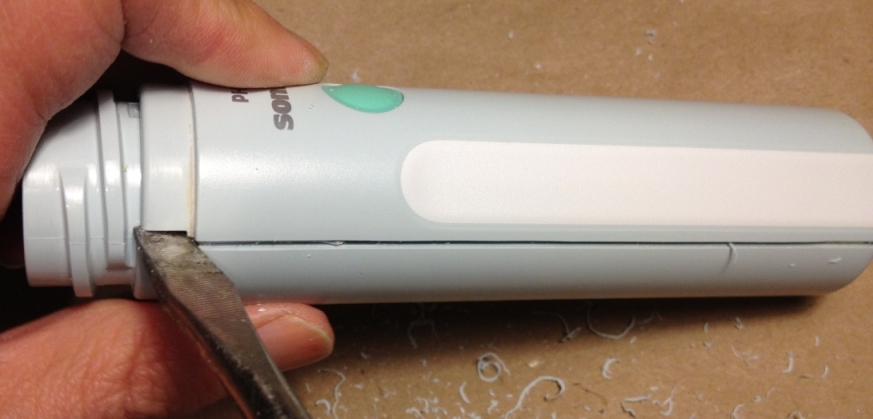
Step 1: Slowly slide a utility knife blade with steady pressure along the groove line to remove a thin layer of plastic each time. Be very careful about your fingers and only cut the groove lines not the plastic cover.
Step 2: Repeat 30-50 times or more for each groove line on both sides and the bottom until blade cuts through. Be careful not to damage the electronics inside the cover.
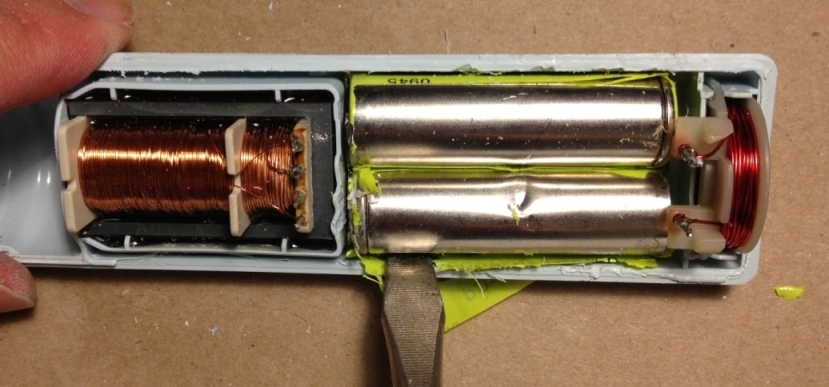
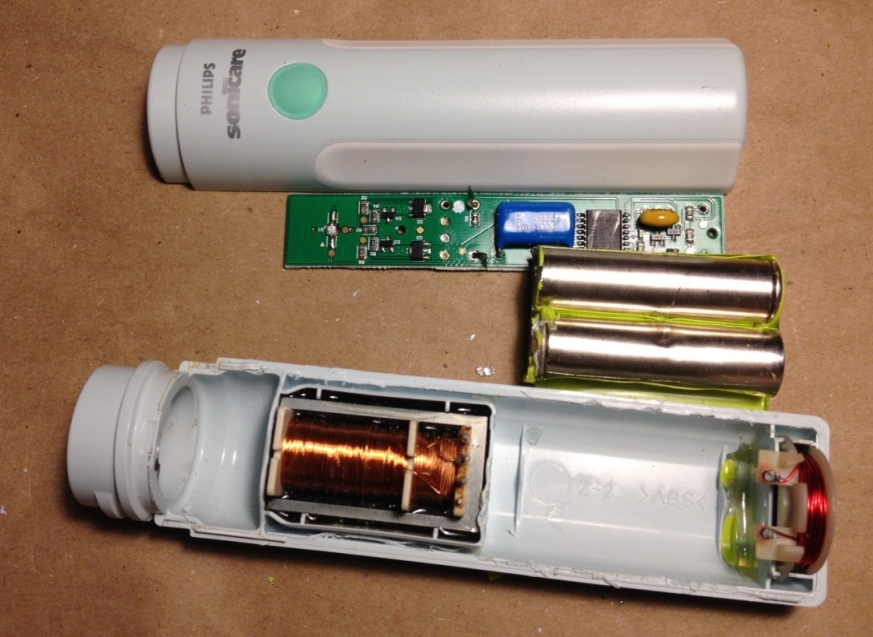
Step 3: Insert flat-head screwdriver into the small opening and try to pry open the cover. Alternate between two sides and pry slowly. The cover will split into two halves when open.
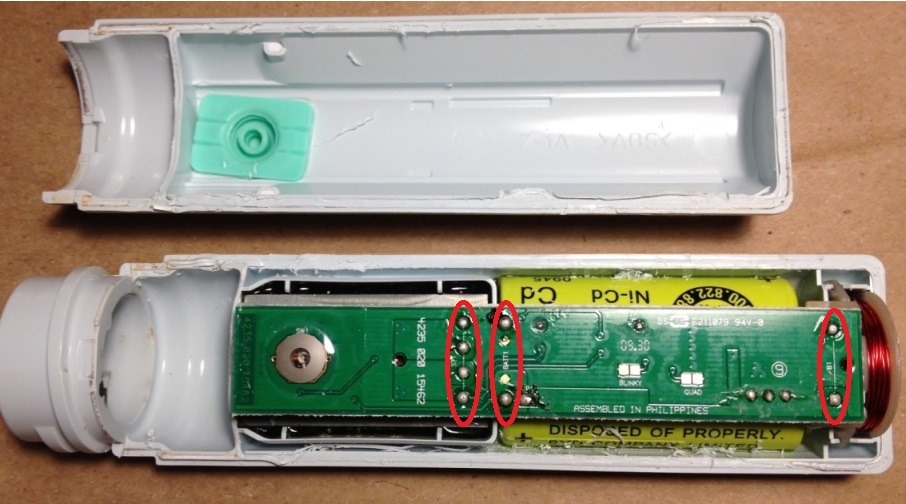
Step 4: Locate the 8 solder points on the circuit board. Use soldering braid and soldering iron to remove the solder as thoroughly as possible.
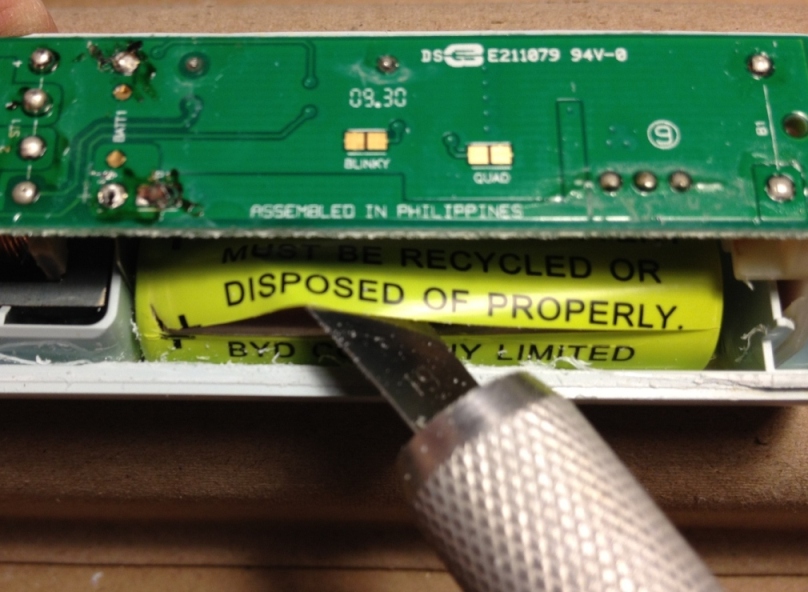
Step 5: Use a utility knife to cut open the battery wrapper on both cells. You can do this step after pulling out the circuit board.
Step 6: You can use cutting pliers to cut off the battery pins on both cells so that removing the circuit board will be easier. With a clean soldering iron to unsolder some trouble soldering points, slowly pull up the circuit board.
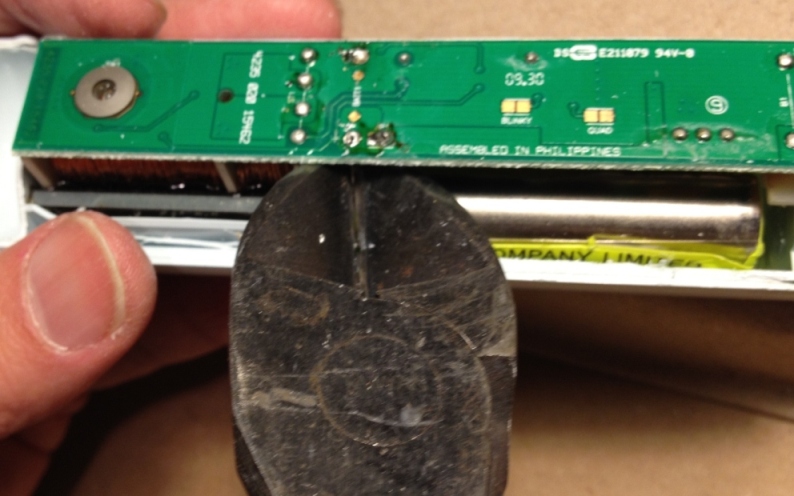
Step 7: Now, you should see that the cells are glued to the shell. The glue is messy to get rid of and the best way is to leave the battery wrapper with glue but remove the cells from wrapper.
Step 8: Remove the battery wrapper on the top as much as possible. Pry the cells with a screwdriver to free them from wrapper.
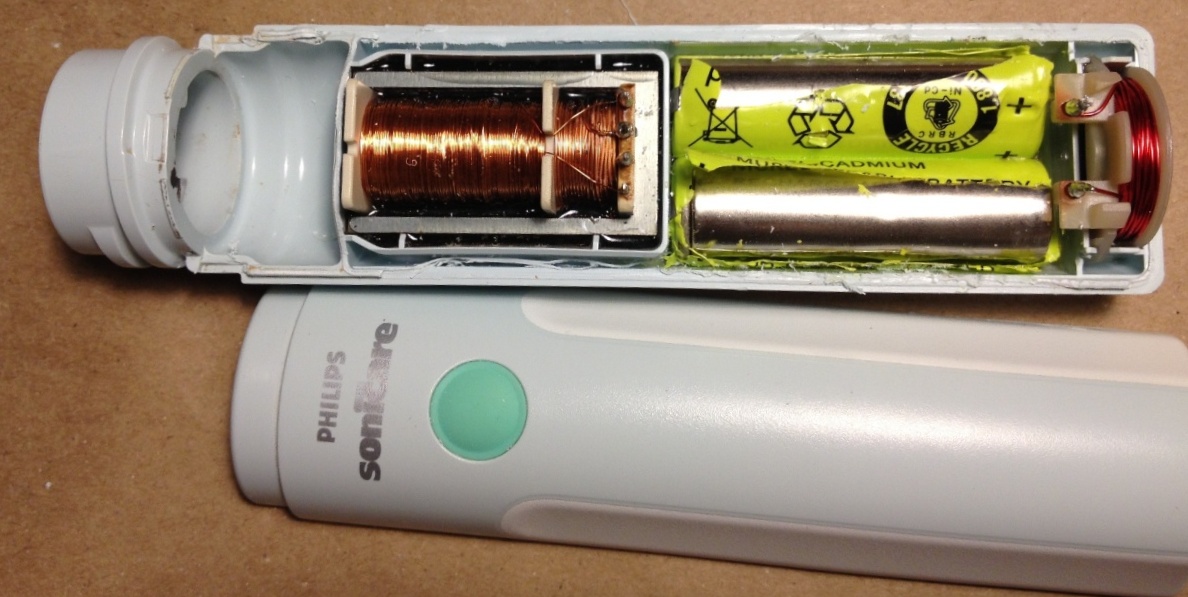
Step 9: Sometimes, you might end up removing the glue block together with cells as shown. Otherwise, leave the glue in the shell after you pull out the cells. You are now ready to install new batteries.