Philips Sonicare Elite (Pro) Model Toothbrush Battery Repair and Replacement Instruction
Tips & Warnings
We are not responsible for any damage or injuries you may incur in the process.
The process described is not recommended by the manufacturer, but can be done. It takes some practice, so be careful in attempting it.
Replacement batteries are provided in our Battery Store. The exact battery configuration and/or service offerings are described as clearly as possible in each listing. These instructions and battery recommendations are for your reference only and are NOT part of sales.
Tried and True Instructions
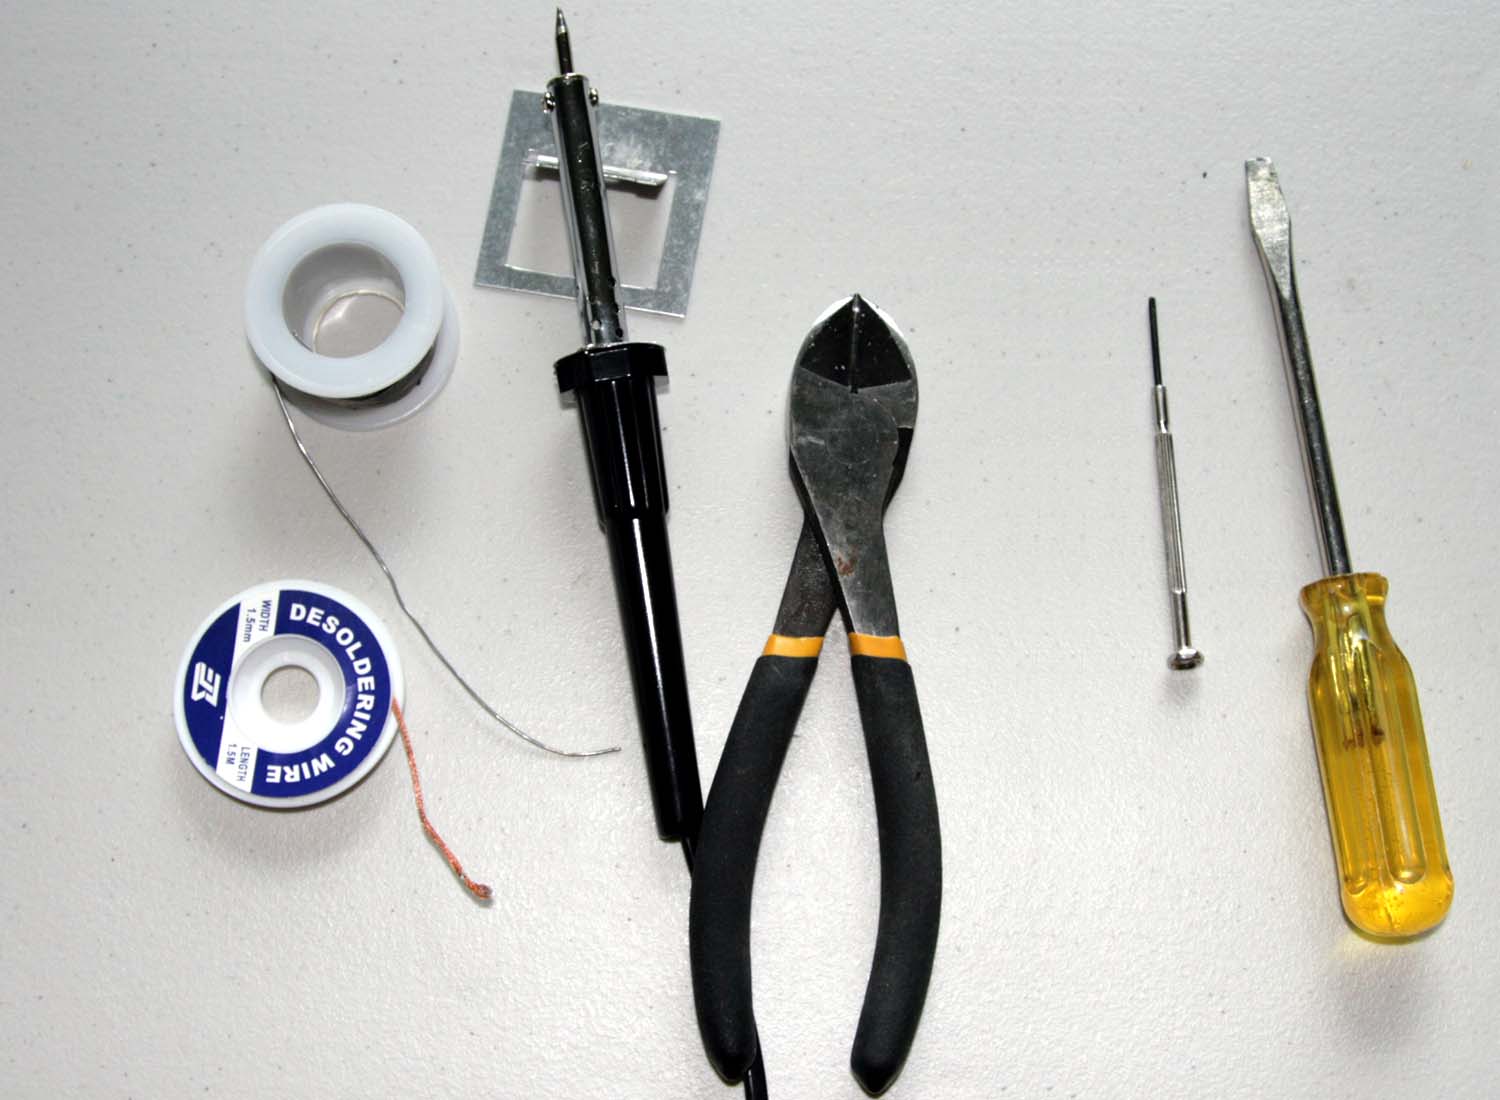
TOOLS: Solder; De-soldering braid; Soldering iron; Utility knife or Cutting pliers; Small-size and medium-size flat-head screwdrivers.
Step 1: Deplete the old rechargeable battery by running the handle until it no longer turns on.
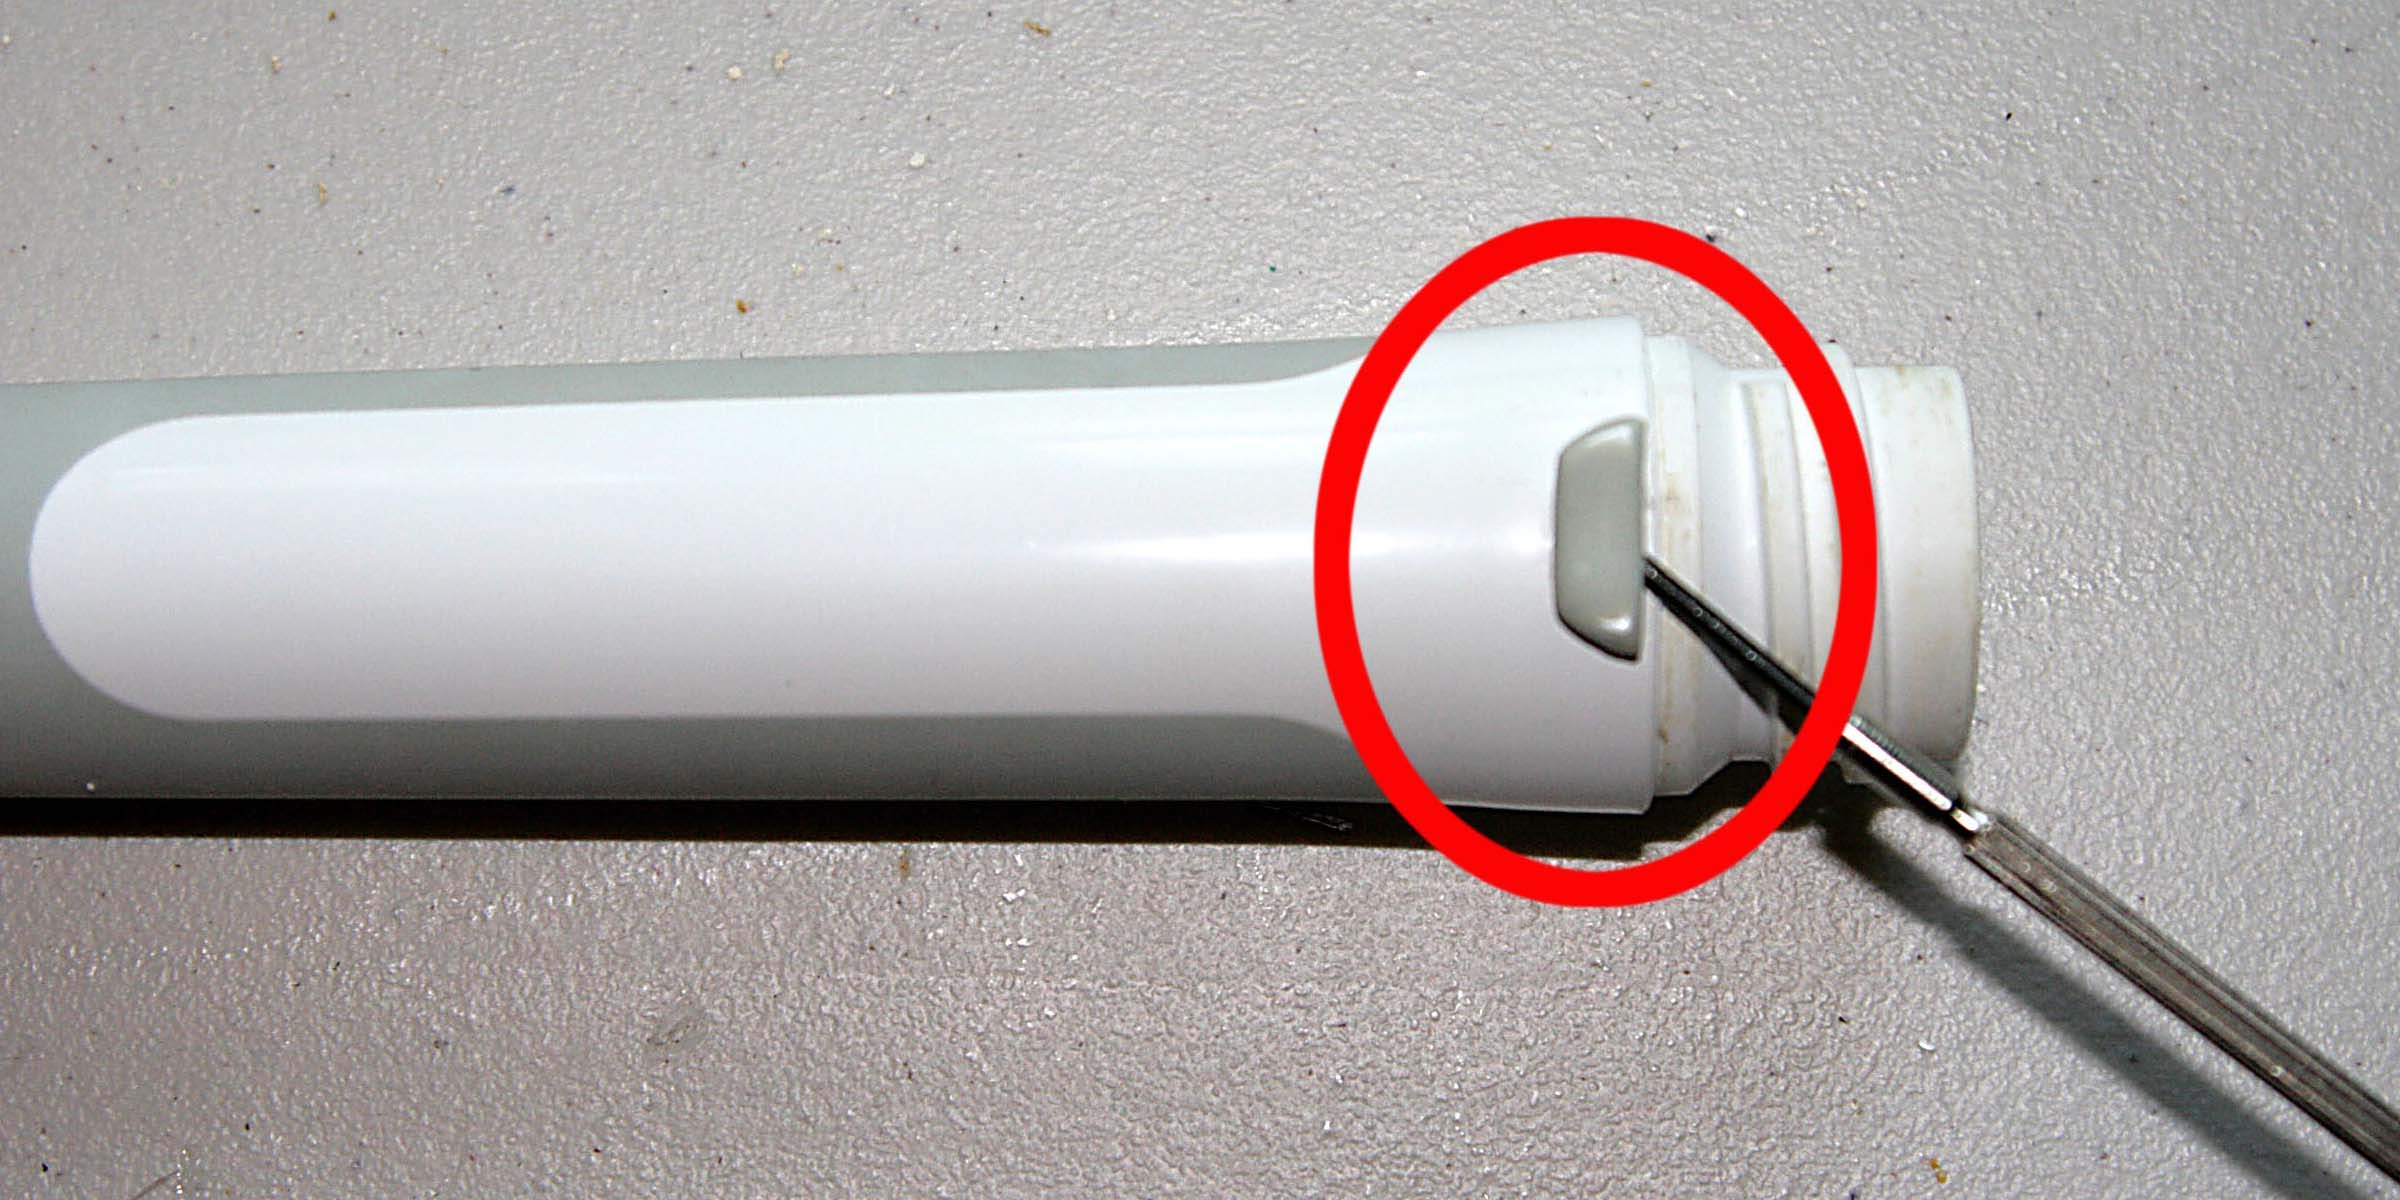
Step 2: This step is for Elite Pro model only. Elite Pro model has a small trapezoidal rubber bumper at the top back of handle. Remove it by carefully slipping a thin flat-head screwdriver or a knife blade under it from the long edge and gently prying it out of its housing. This rubber piece is not critical, but it's nice to have to keep the handle from rolling around on the counter.
Step 3: This step is tricky. Use a brush head collar (the bottom part of Elite toothbrush head, plastic piece with thread in the inside wall). Better to use an old one in case it cracks in the process. Tighten it onto the top of handle and rock it slightly from side to side. This will usually extract the inner part slightly. Then tighten the collar again against the handle and repeat the rocking and tightening actions until the inner part begins to loosen.
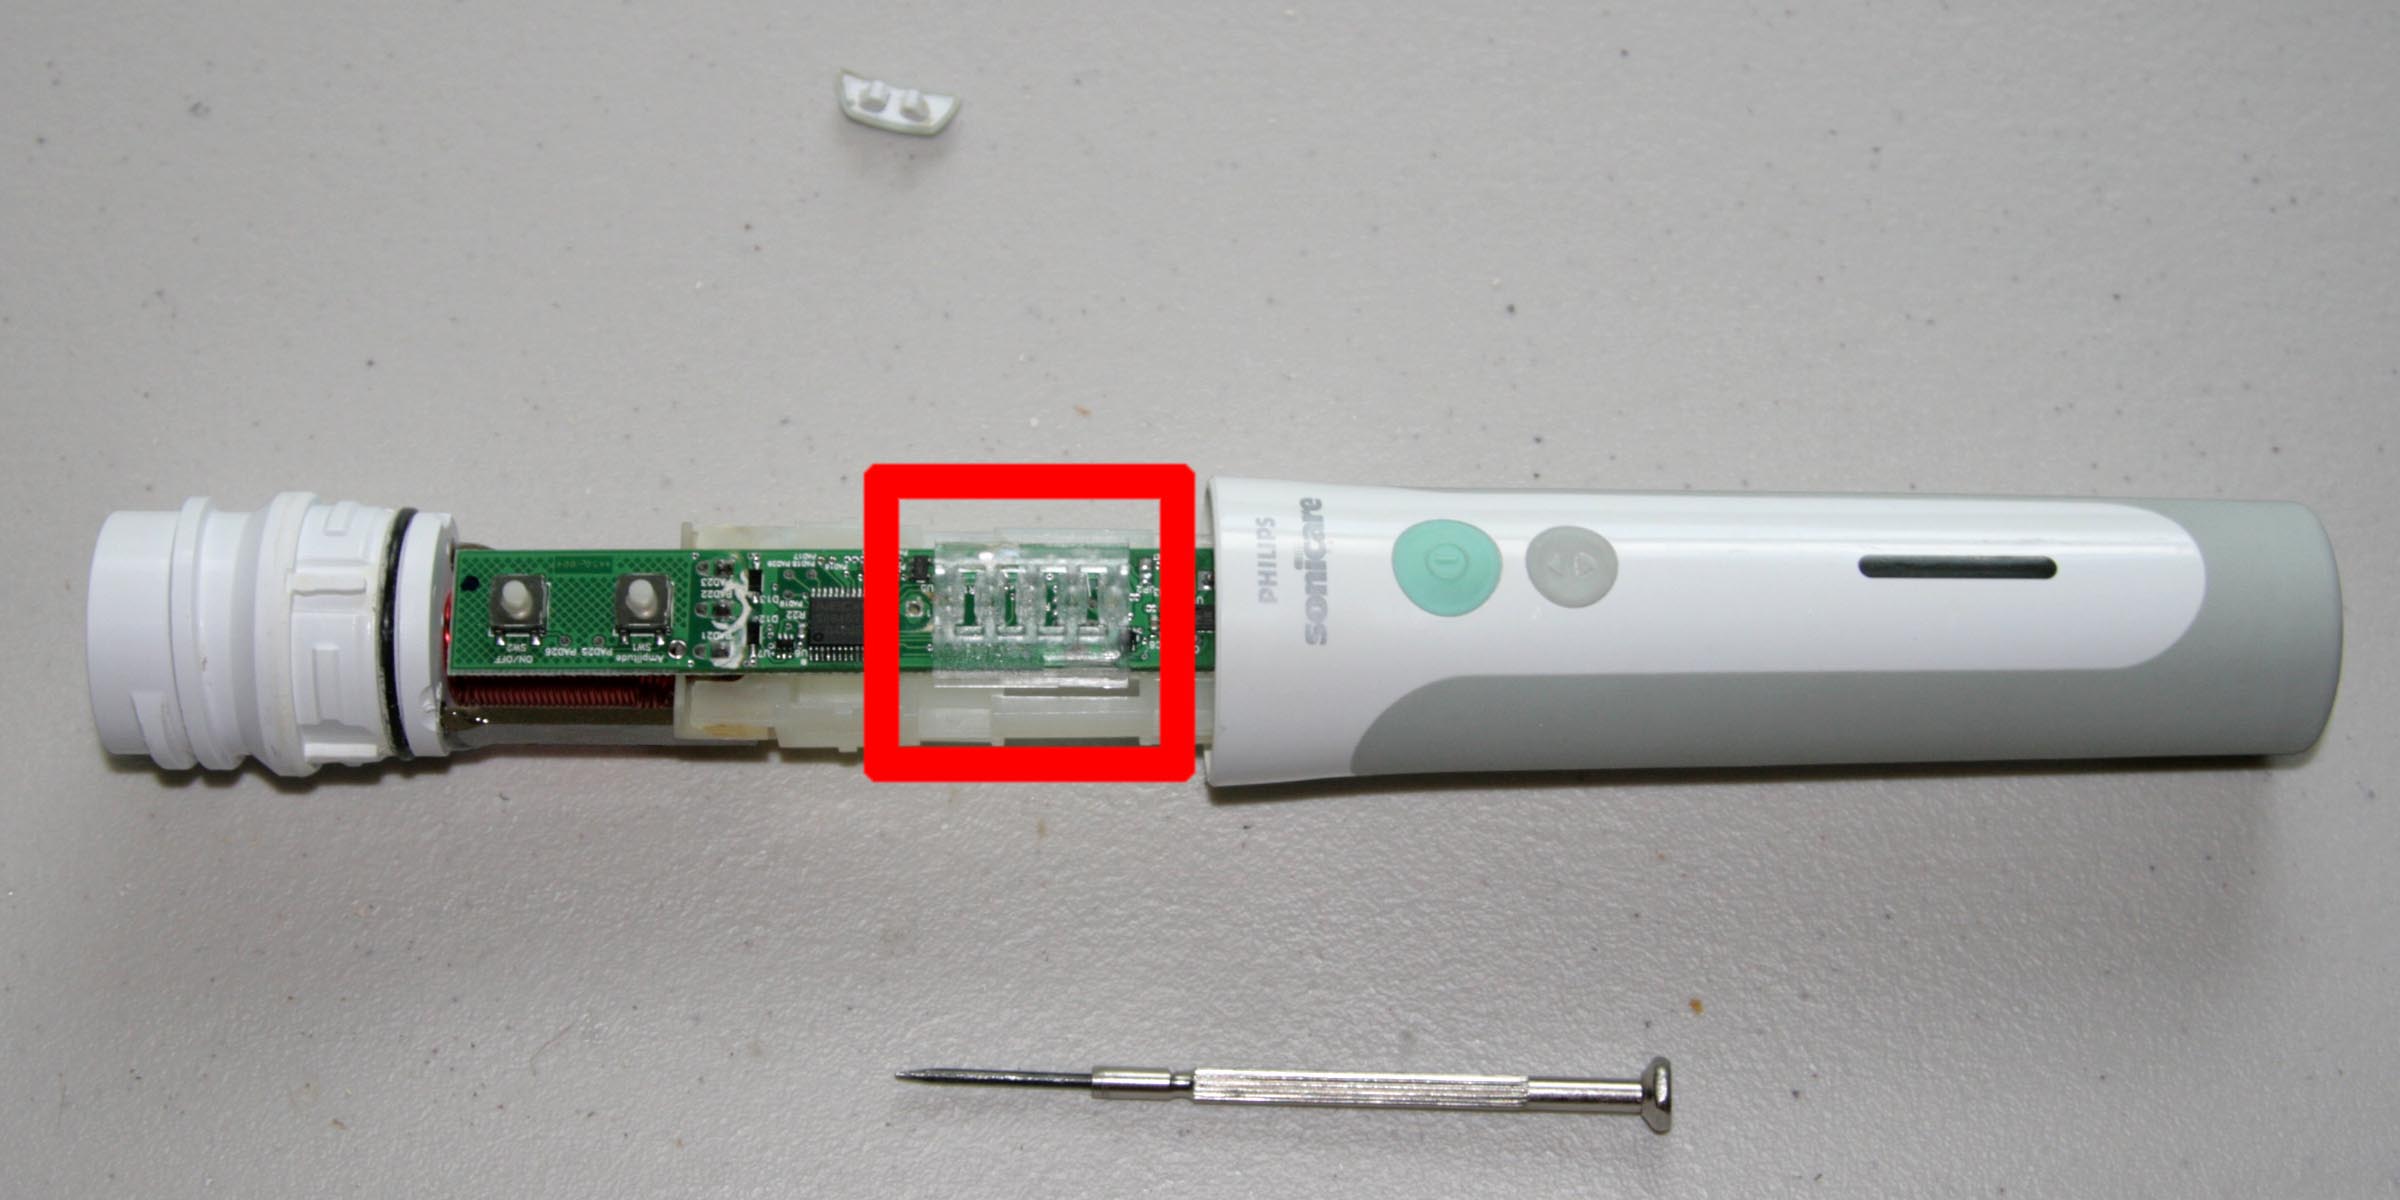
Step 4: Once loosened, pull the inner circuit board out. Locate the LED lens and gently pry it out of circuit board with a screwdriver
Step 5: Cut off the 2 small plastic ledges that hold battery in the back.
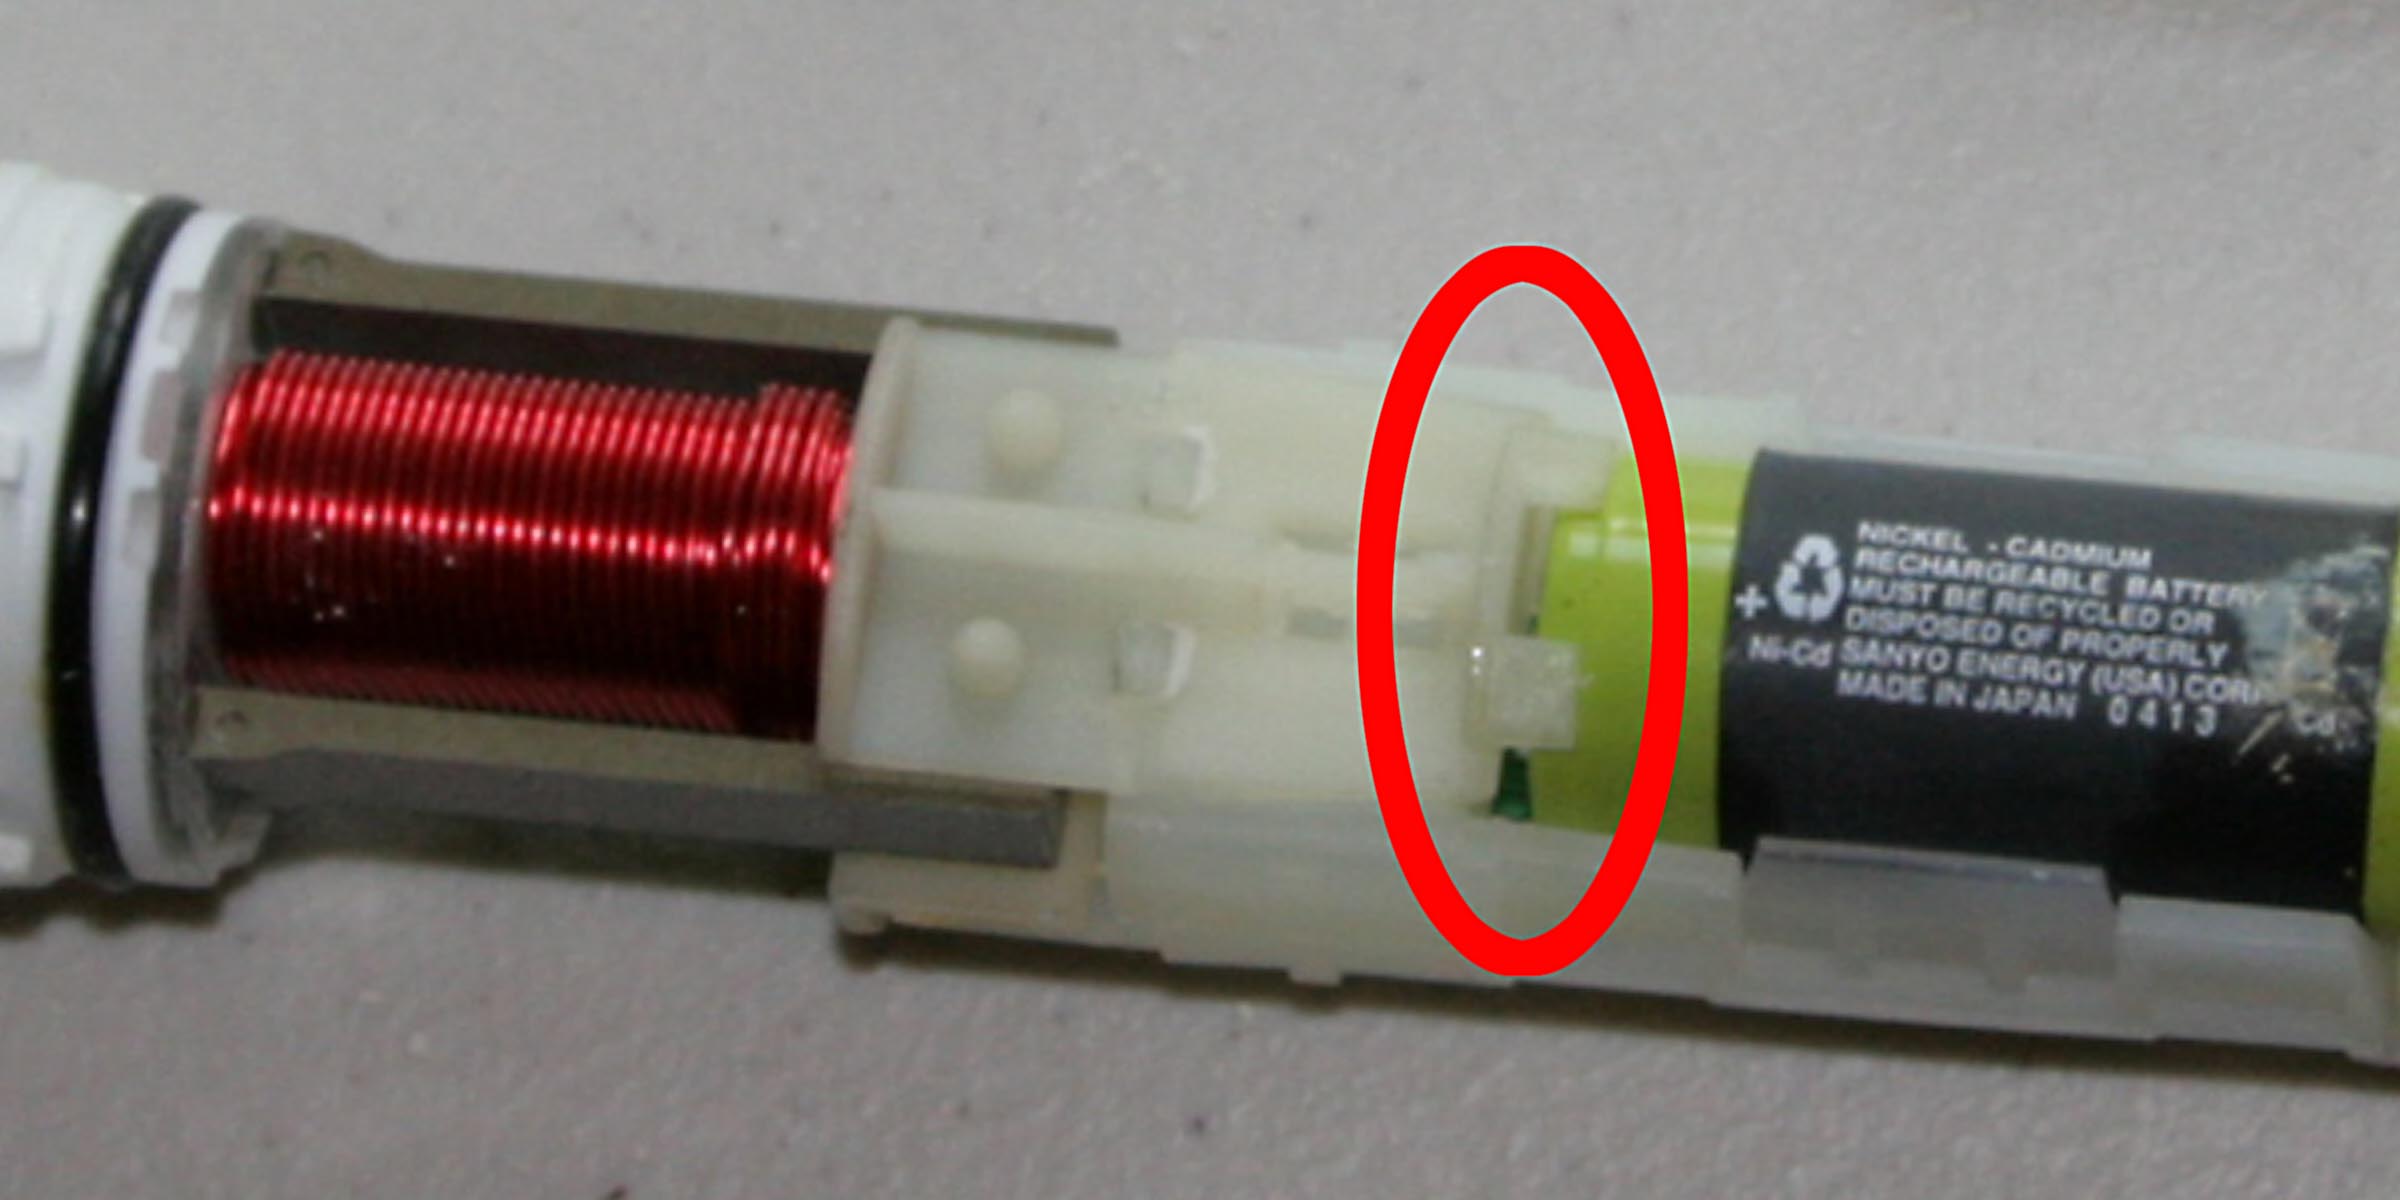
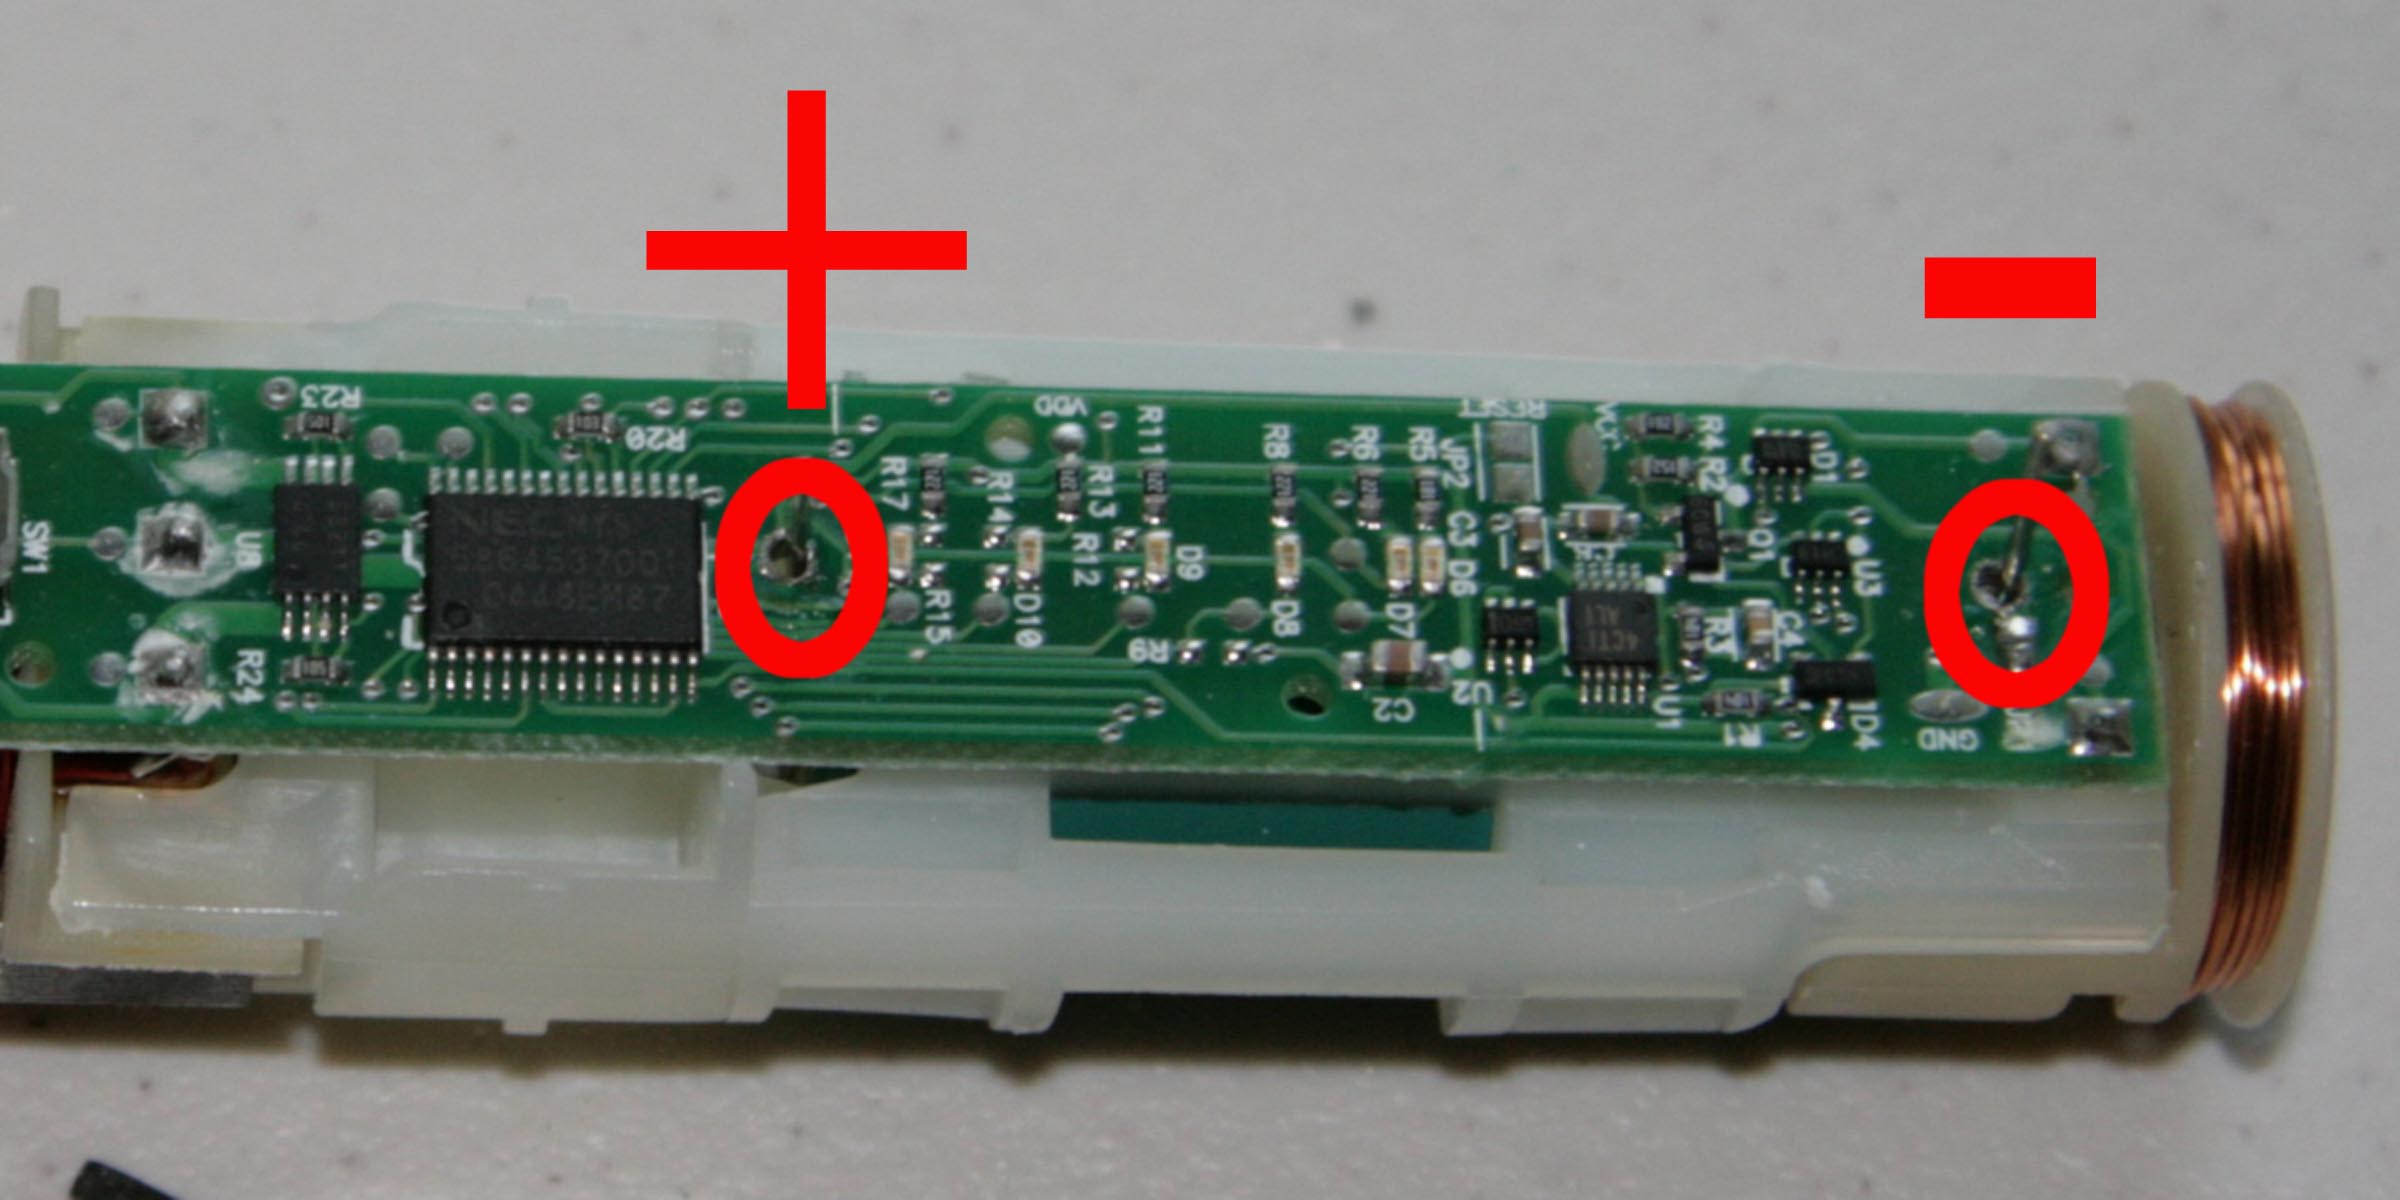
Step 6: Locate the two solder points on the circuit board. Use a soldering braid and a soldering iron to free the battery pins from the board. Pull the battery out. You may need to use the screwdriver to dislodge it, but with the battery pins unsoldered, that shouldn't be difficult.