Braun Oral-B Sonic Complete Model Toothbrush Battery Repair and Replacement Instruction
Tips & Warnings
We are not responsible for any damage or injuries you may incur in the process.
The process described is not recommended by the manufacturer, but can be done. It takes some practice, so be careful in attempting it.
Replacement batteries are provided in our Battery Store. The exact battery configuration and/or service offerings are described as clearly as possible in each listing. These instructions and battery recommendations are for your reference only and are NOT part of sales.
Tried and True Instructions
STOP!!! You need to know these two things before proceeding. First, the components inside are spring-loaded. Second, the base of the toothbrush remains connected to the inside with four thin and VERY FRAGILE copper wires. Read complete instruction before attempting.
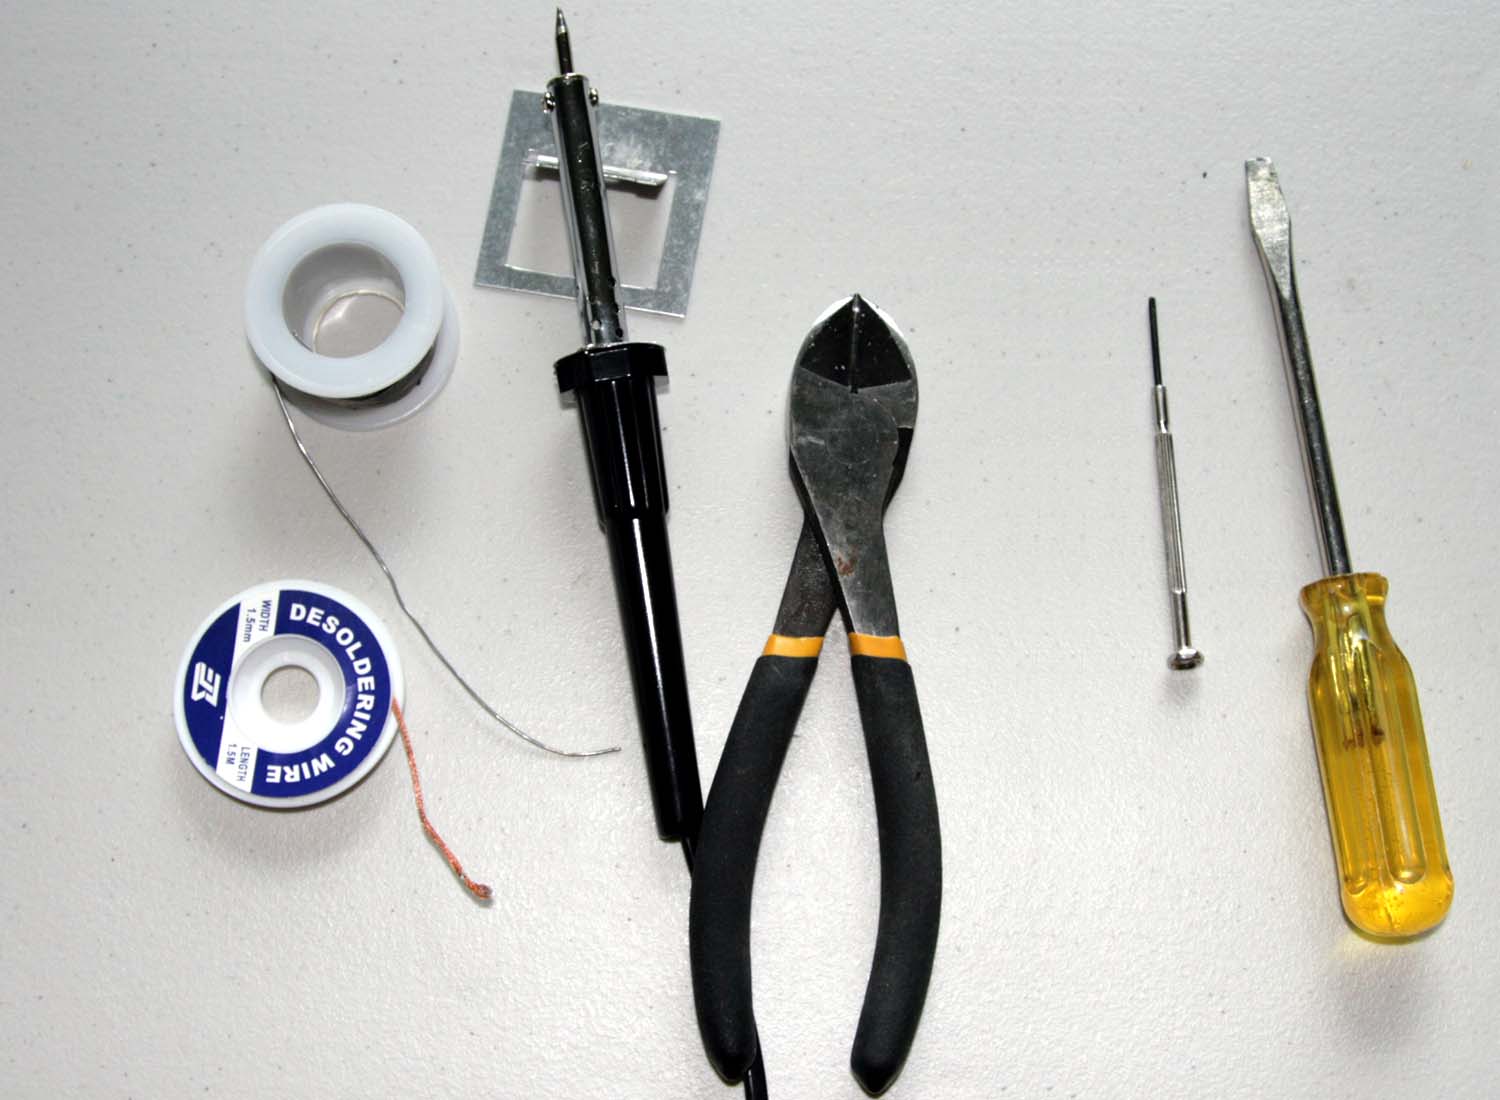
TOOLS: Solder; De-soldering braid; Soldering iron; Utility knife or Cutting pliers; Small-size and medium-size flat-head screwdrivers.
Step 1: Deplete the old rechargeable battery by running the handle until it no longer turns on.
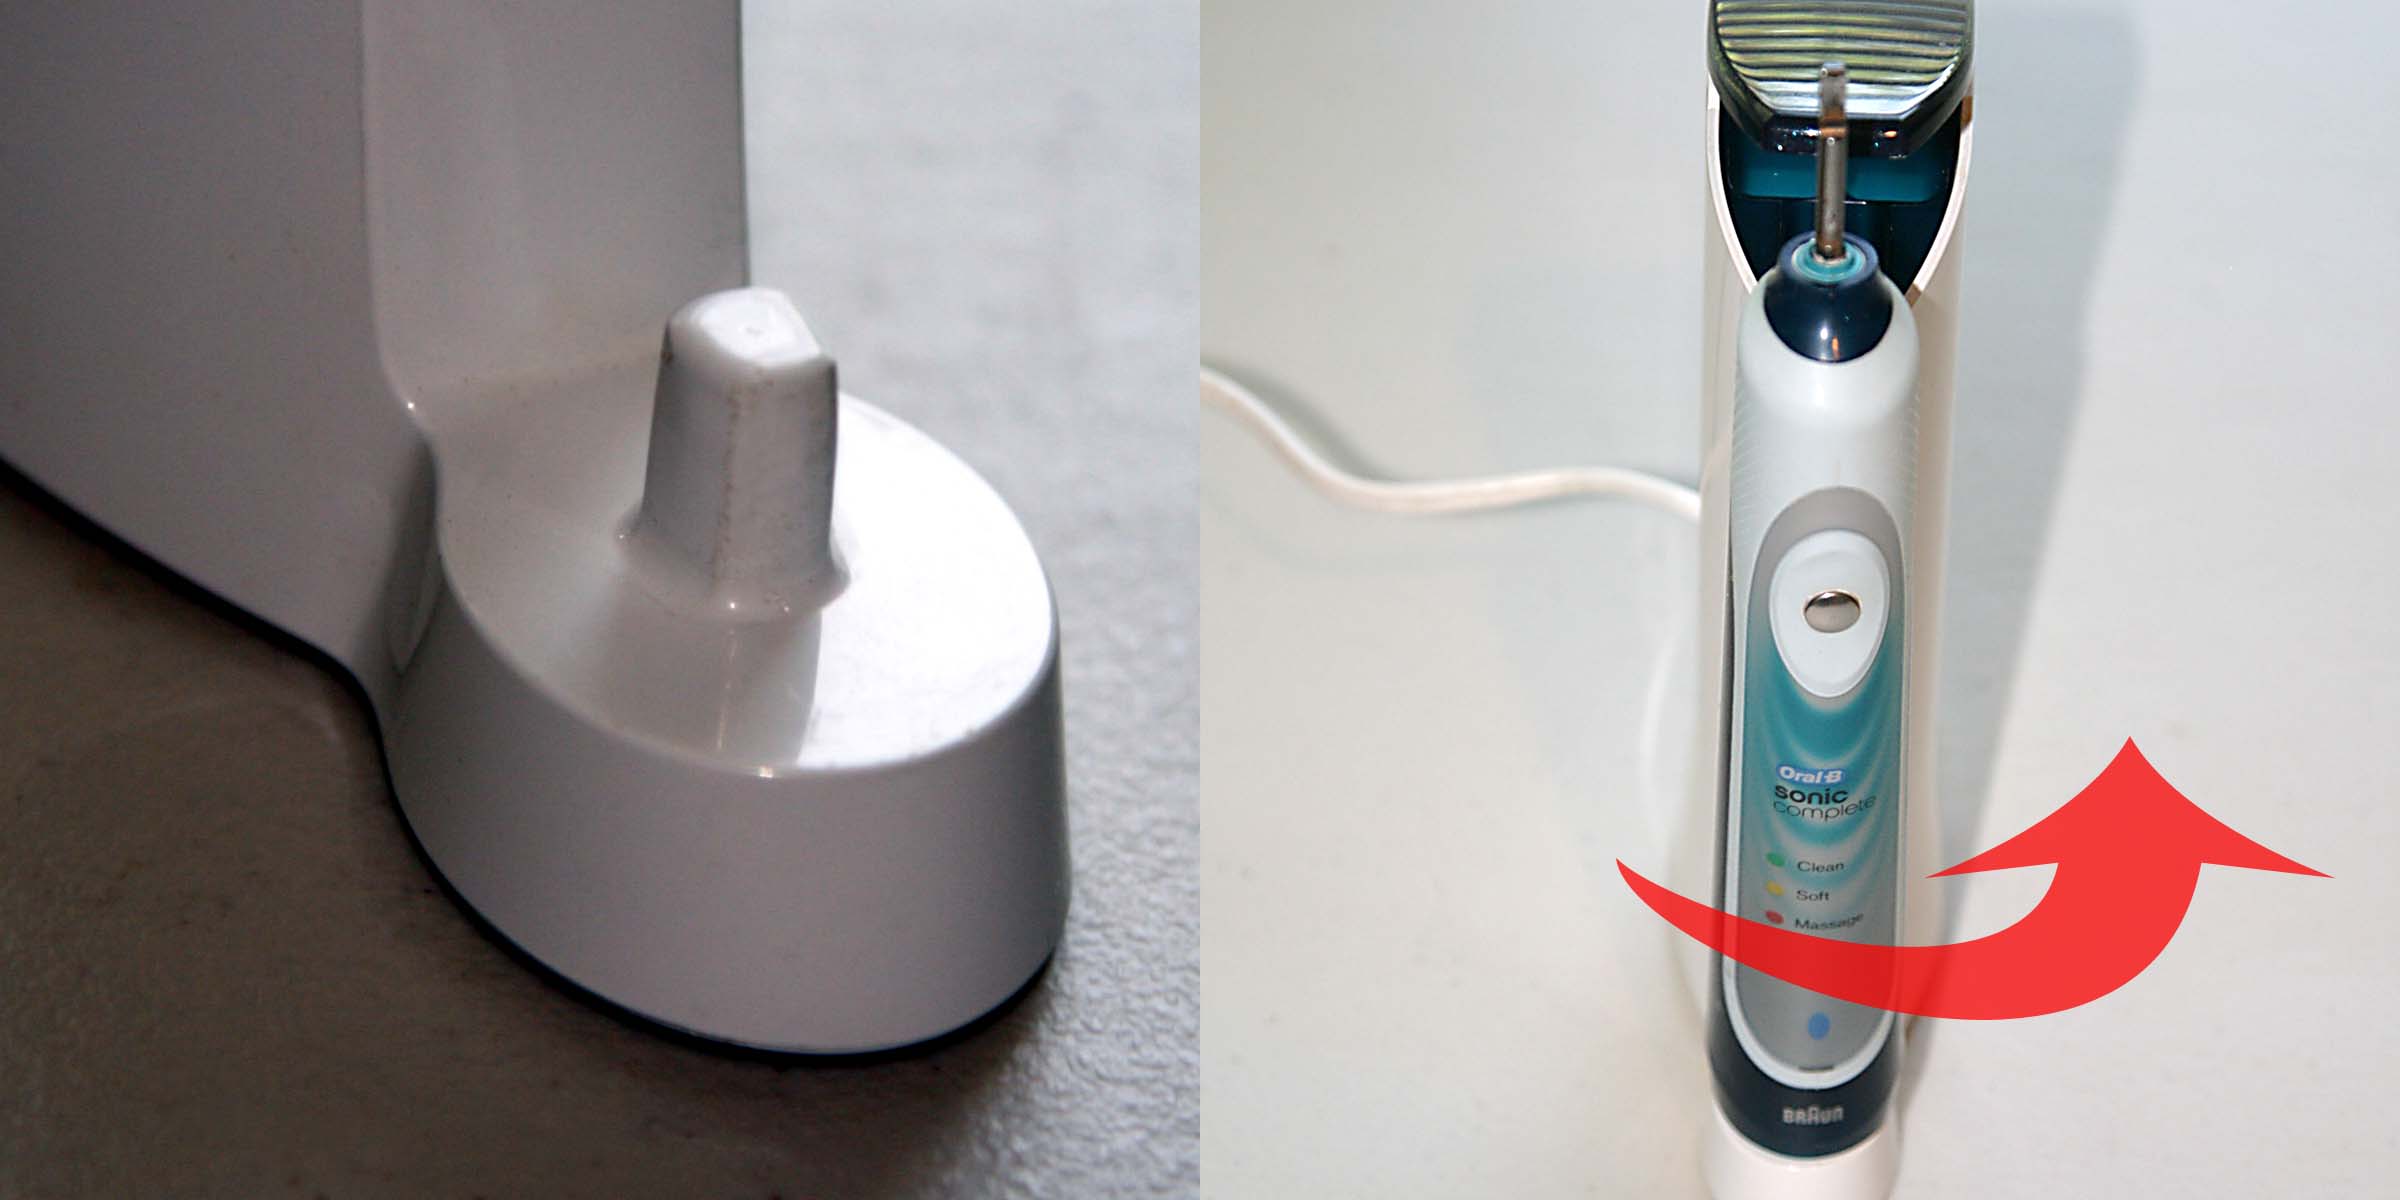
Step 2: The "tool" for unlocking the base of the toothbrush is the stub on the charger as shown. Get a good grip on the toothbrush, place it firmly on the stub. Twist it counter-clockwise slightly while pushing the handle down into the charger. It takes about 45 degrees to unlock. Some customers choose to use the stub on the back of the charger (if your charger has one), which has a more secure fit. That is totally fine as long as when the handle is unlocked, you don't pull on the wires (see next step for picture)to get the base out. Instead, you should use a screwdriver to slowly pry the base off.
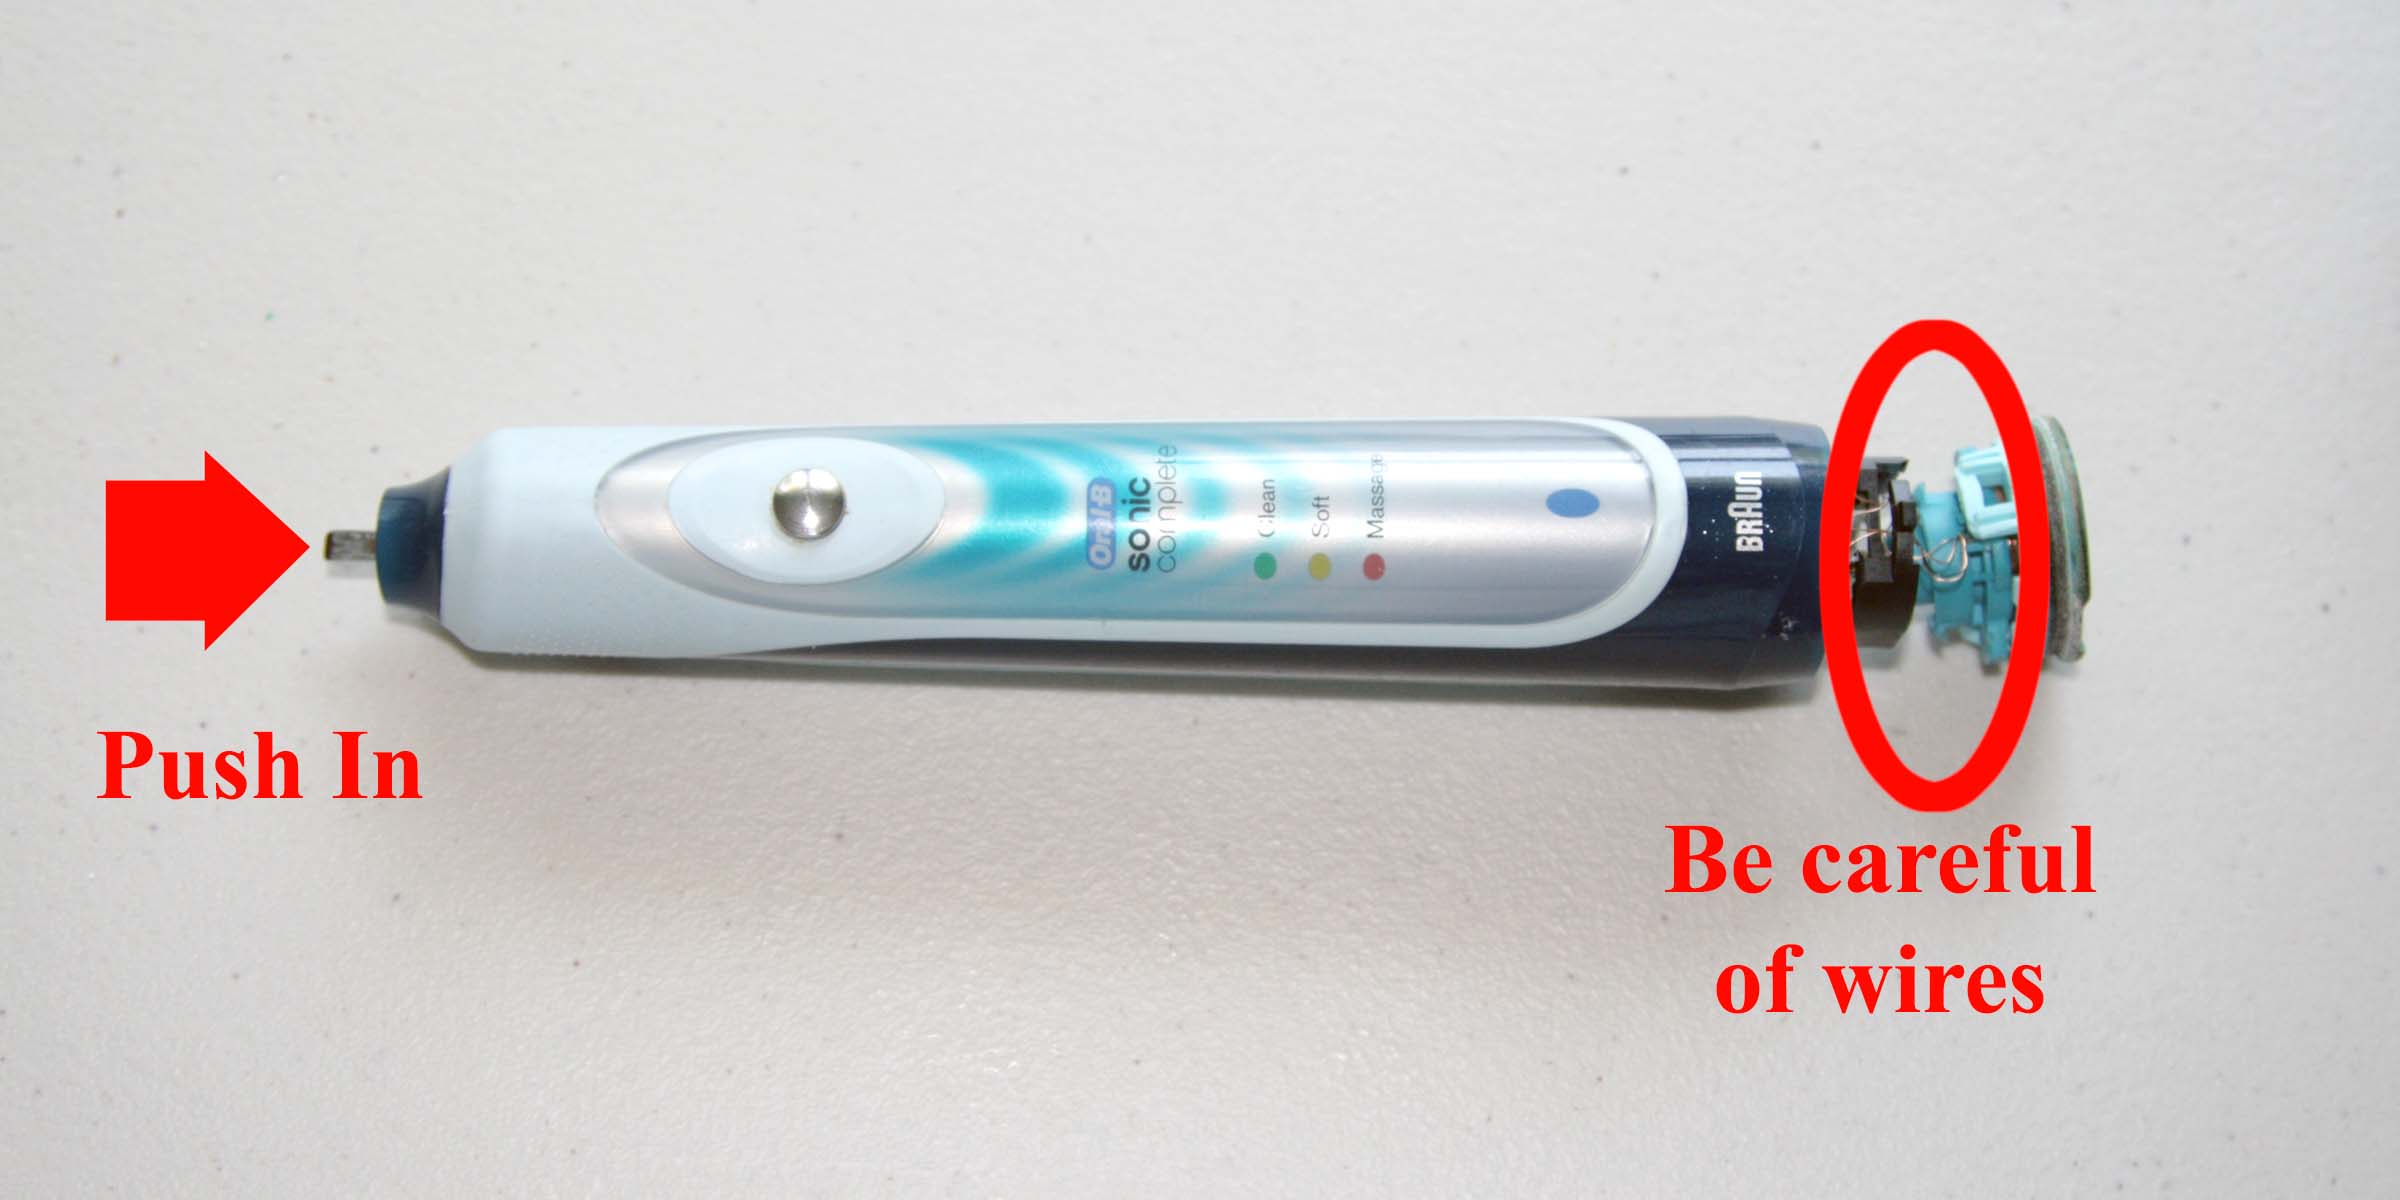
Step 3: When you feel it pop, gently push the shaft from the top into the casing. Do NOT pull the toothbrush out via the four thin copper wires - they break easily and it is very difficult to fix.
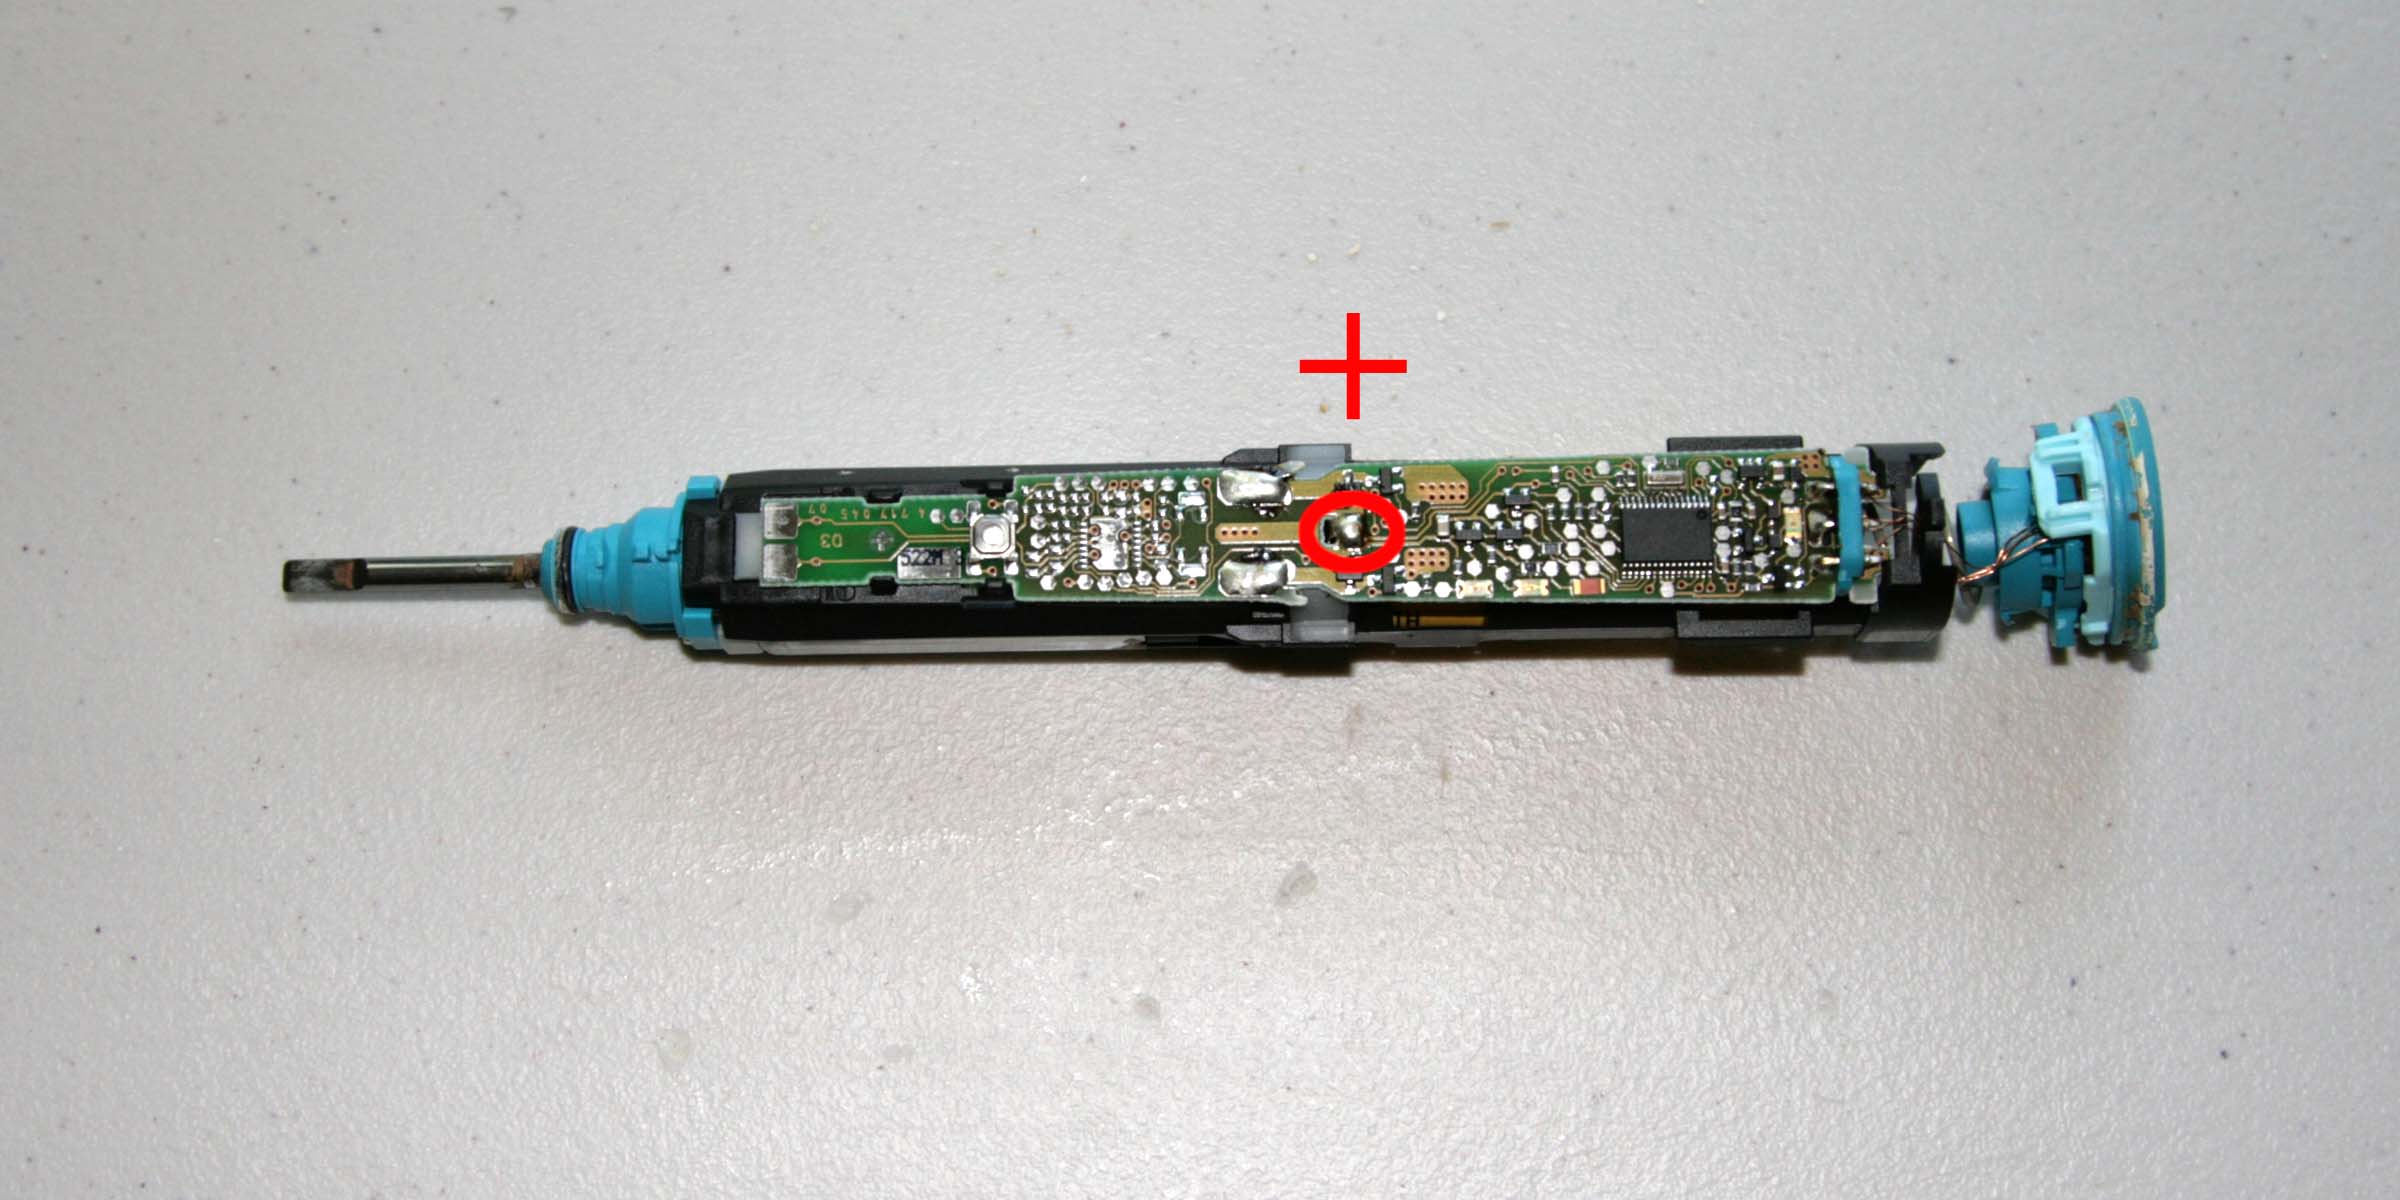
Step 4: The battery is soldered on the circuit board. Locate the positive battery solder point on the circuit board. Unsolder the positive tab from the circuit board.
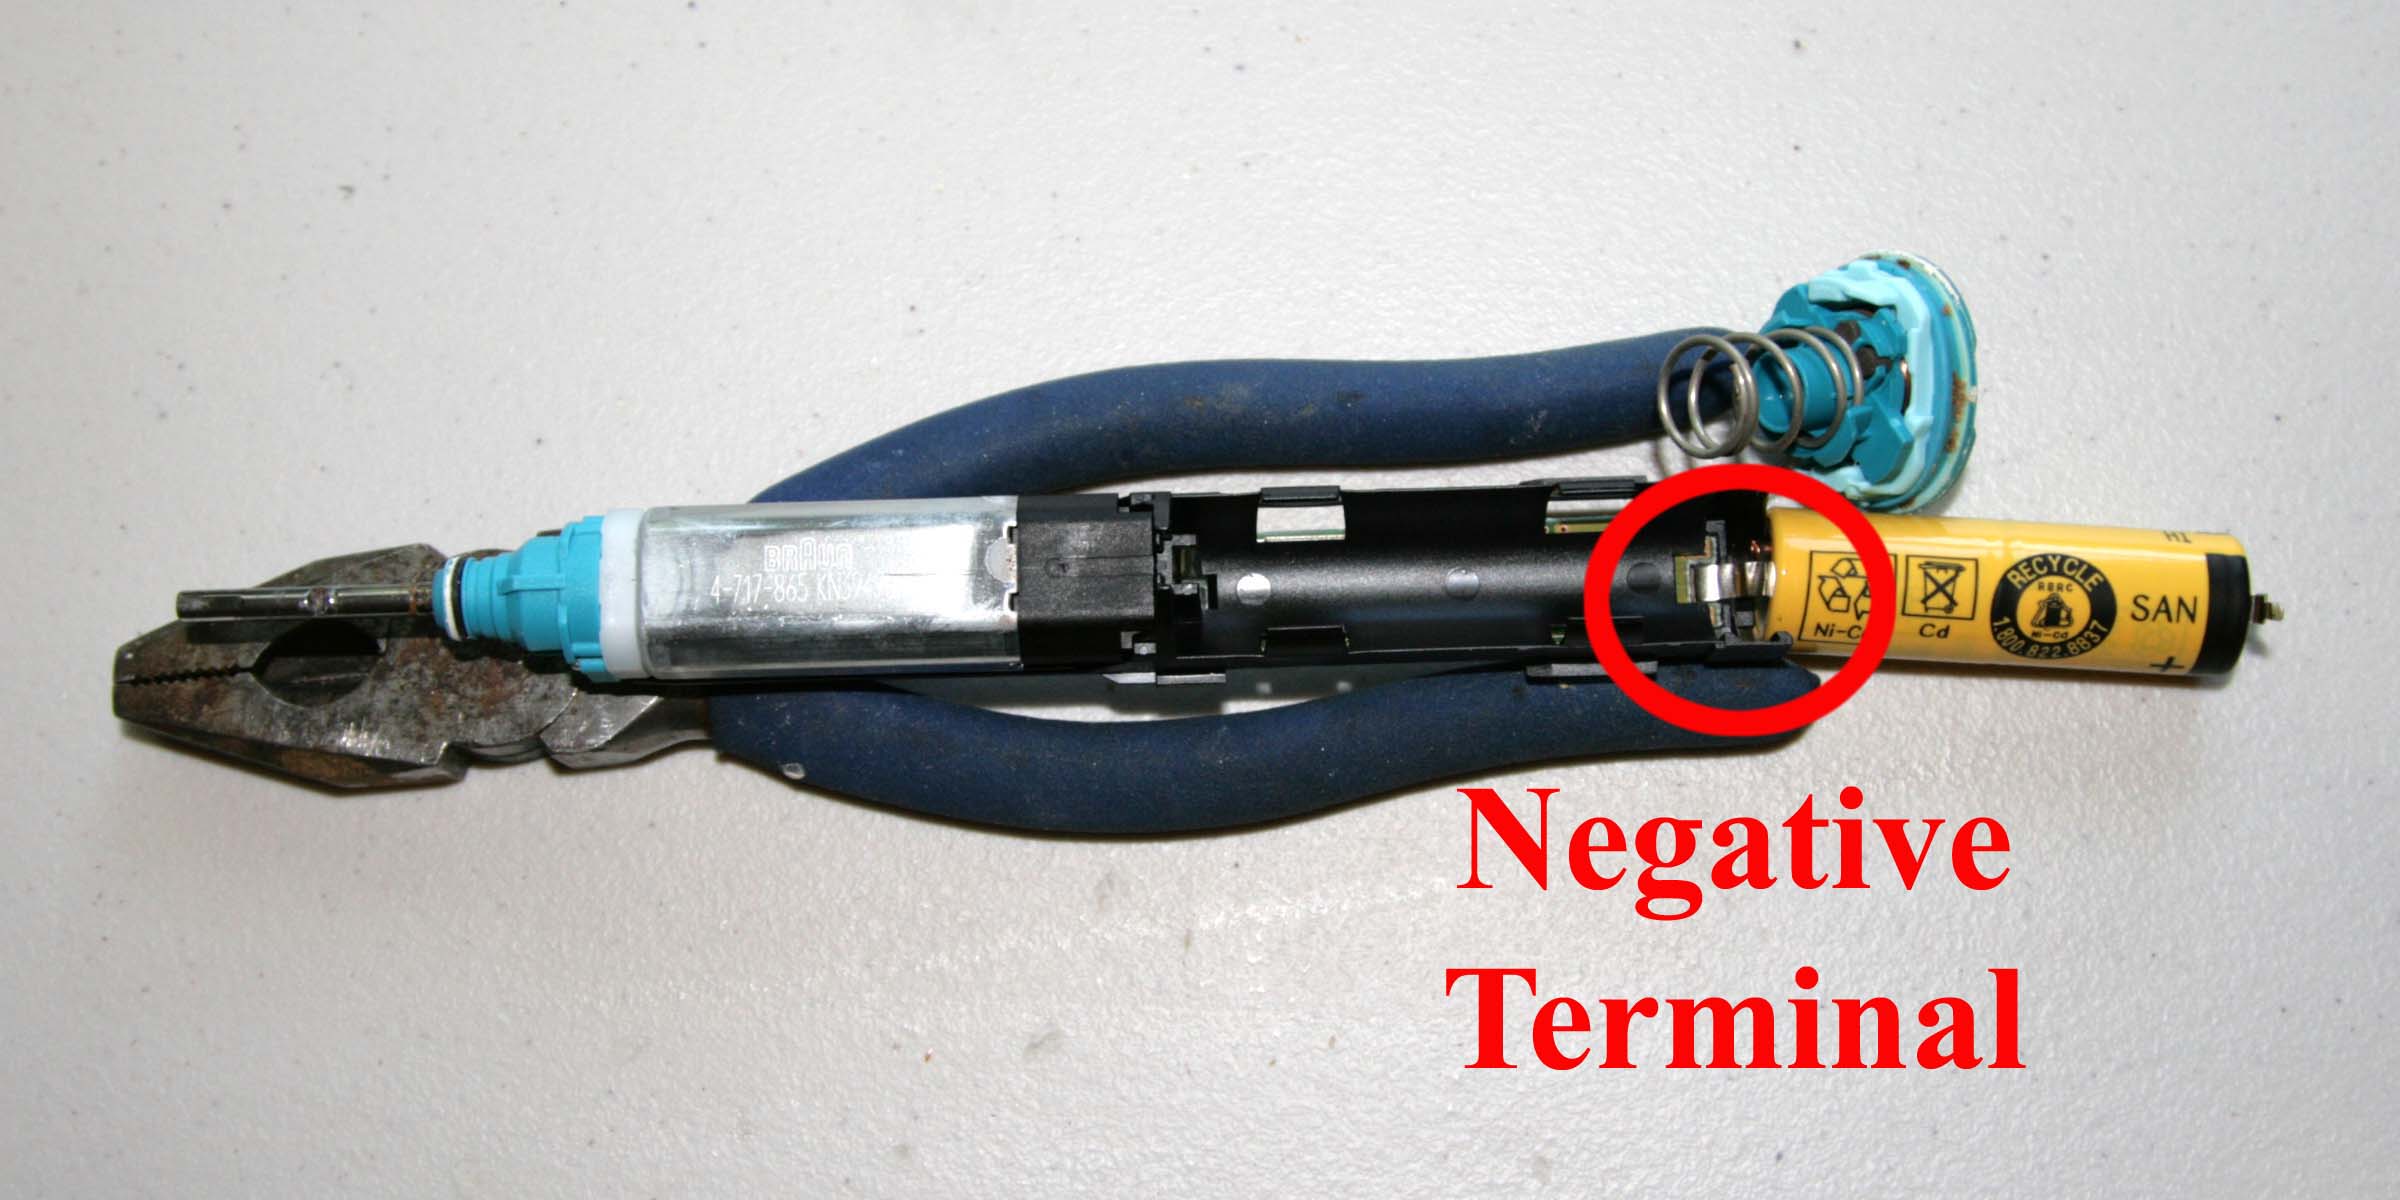
Step 5: Use a screwdriver to pry the positive end out of the battery holder. Flip the battery and expose the negative battery terminal, where you will find solder tab connected to the circuit board. Leaving as much of the negative solder tab attached to the circuit board as you can, cut the negative tab with scissors as closely as possible to the battery's negative terminal.